The Raglan Overcoat - making the toile
Moving from measurements, to developing the pattern, to making a toile.
Welcome back to the Hold Fast Bespoke blog.
Just to recap this project, the pattern pieces have been drafted to a set of industry standard measurements; in this case my size, a men's 40 Short. The end game is to validate the accuracy of the drafting system. In so doing I will be able to offer the coat in standard sizes, with reasonable assurance that it will fit well without extensive alterations. If it fits me, it should fit any other size 40 S man; and I’d be reassured that other sizes would fit as well. To reach that destination it will be necessary to make a toile, a prototype made from inexpensive muslin fabric.
Let’s get cutting.

The toile verifies the accuracy of the draft.
I’ve been know to make some pretty slapdash toiles, often out of thrift store sheets. I leave out lots of the details. Primarily I’m checking the sleeve length (always too long), and the shoulder slope (I have a dramatically dropped left shoulder). Of course in previous garments I’ve been working from a commercial pattern. This project is a completely different animal.
I’m essentially verifying each piece of the pattern. No cutting corners. Careful assembly of the toile will immediately reveal any errors I’ve made in the drafting, and there were some glaring ones! Also, two of the pattern pieces were completely superfluous and went straight to the trash. It’s confusing enough without extra pieces laying about; sort of like a DIY project when there are a few extra screws left over.
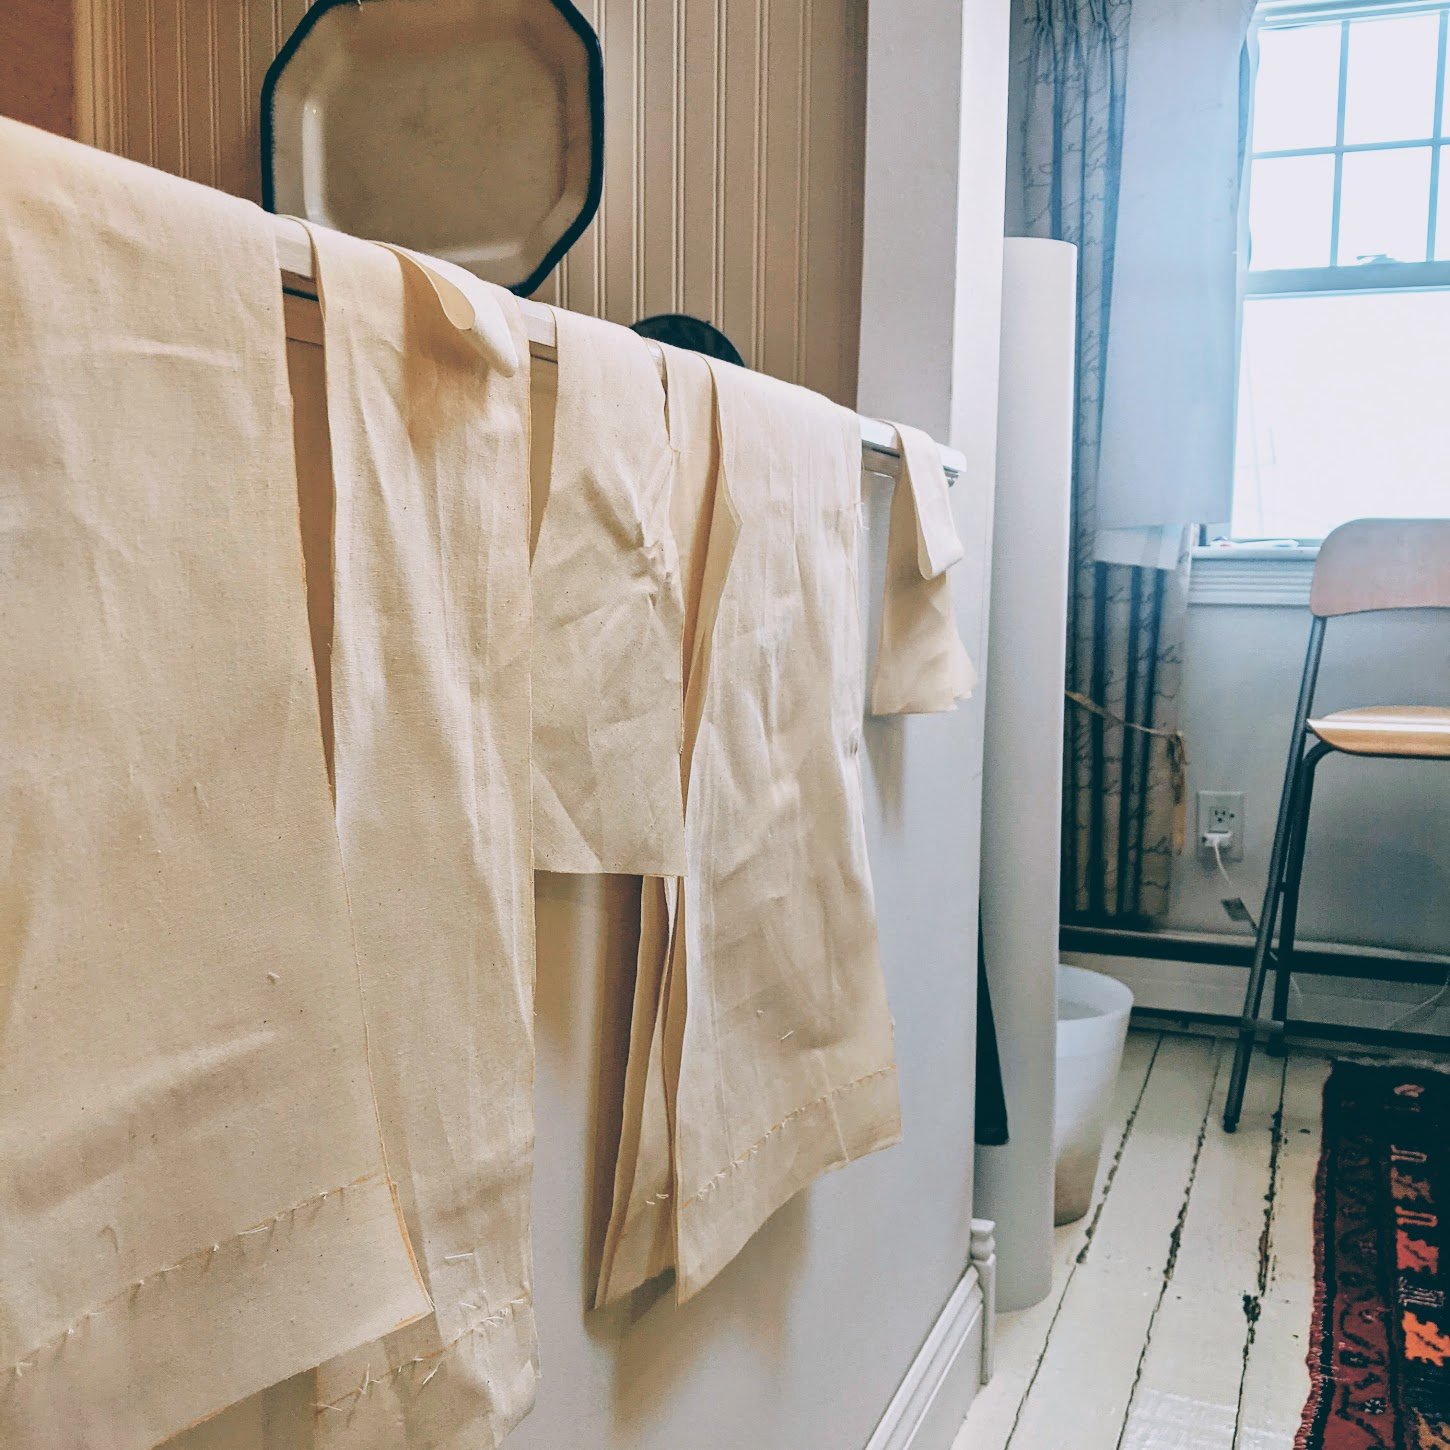
Tailoring = problem solving. My work space is very small so I have to make the best of it. Here the coat parts are draped down into the stairwell awaiting their turn.
I found this wide muslin on Amazon, and it’s actually proven to work well. It’s a decent weight, somewhat coarse, and hasn’t stretched or shrunk when pressed with steam. Yard for yard, the price is hard to beat. 10 yards should last a long time since making a toile is not part of the bespoke process.
Working with wide muslin provides an opportunity to experiment with the layout. Think of it as the dress rehearsal. The goal is to cut in the most economical way possible. By “nesting” the pattern pieces, taking into consideration multiple seam allowances and inlays, I’m hoping to make this coat with 3.5 yards of fabric.

Drafting a three piece raglan sleeve
It’s not always clear sailing here at Hold Fast Bespoke. Converting a set-in sleeve to a raglan sleeve was the most difficult part of the draft. I was taking it step by step and things were moving right along until bits weren’t lining up. I might have been off by 1cm somewhere. Foolishly I continued to work along thinking it was no big deal, that it would straighten itself out. What ensued was the death spiral of drafting.
I had either missed a step or measured incorrectly somewhere. There was no saving it. The more I tried to fix it, the worse it became. So….back to the drawing board, literally.
My second attempt was 99% successful. I neglected to add the seam allowance to the edge where my scissor is pointing. It all “came out in the wash” when I went to put the sleeve together. Fortunately it was an easy fix. More paper! More muslin!
Assessing the proportions and design details
Making a thorough toile has proven to be worth the time and effort. There are minimal details on most raglan overcoats, usually just the pockets and maybe a button tab on the sleeve. That makes getting the proportions of those bits right.
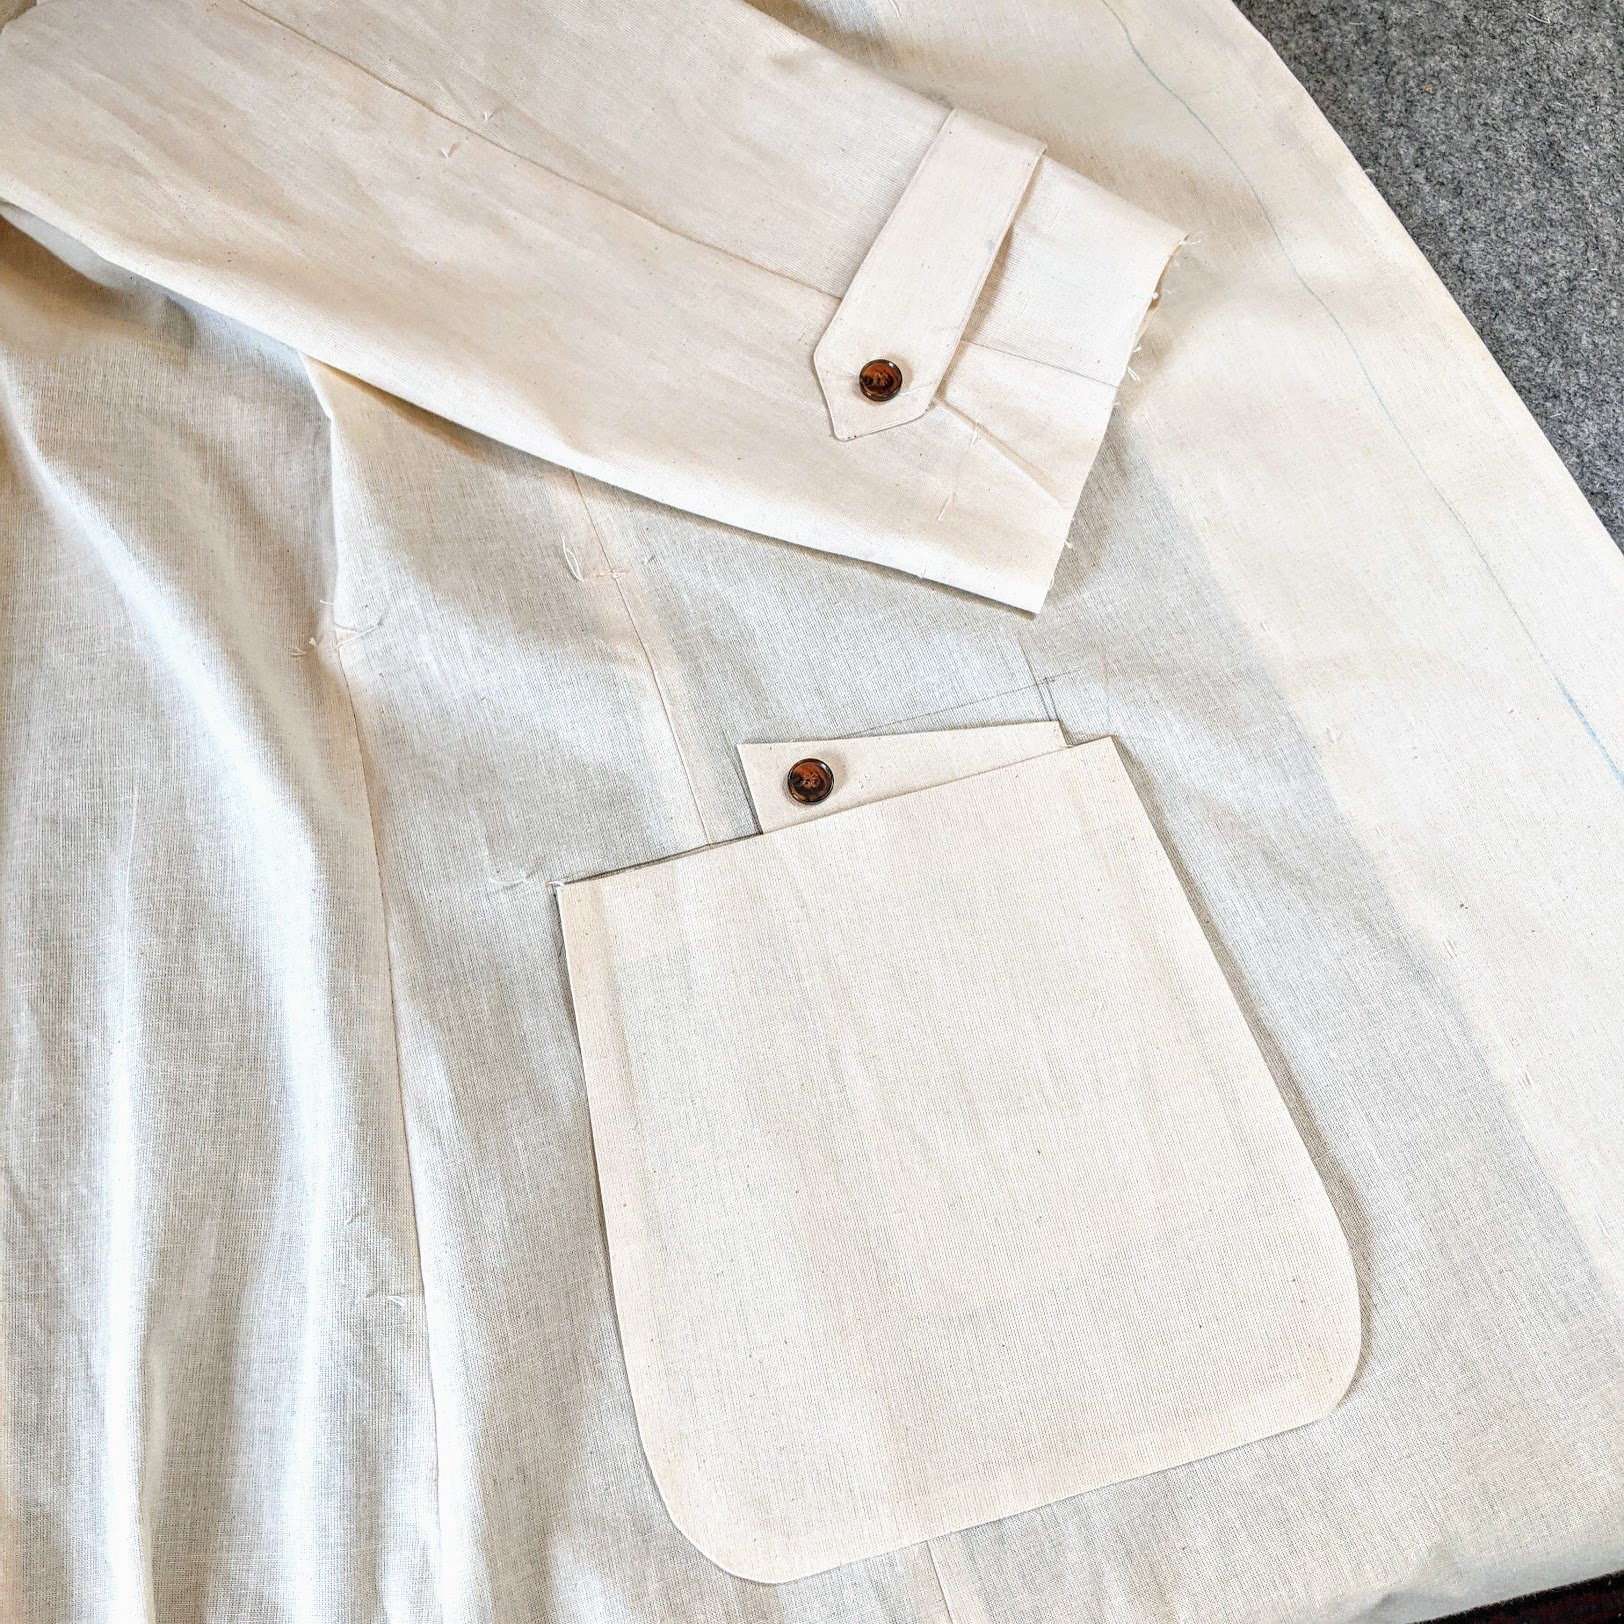
My original sleeve tab was 5 cm wide on paper. But when I actually made it and positioned it on the sleeve, it looked oddly wrong. The proportion / balance was off. It looked heavy and clunky, visually dragging the sleeve down. Just compare the left and right sleeve in this photo and see if you don’t agree.

Reducing the width by just 1cm on the right sleeve brought it back to a more attractive proportion. Without the toile I would never have realized it. Currently the tab looks a little short to me, so I may lengthen it by 2 cm in the final version.

Angled ticket / phone pocket
Why not go for something unexpected
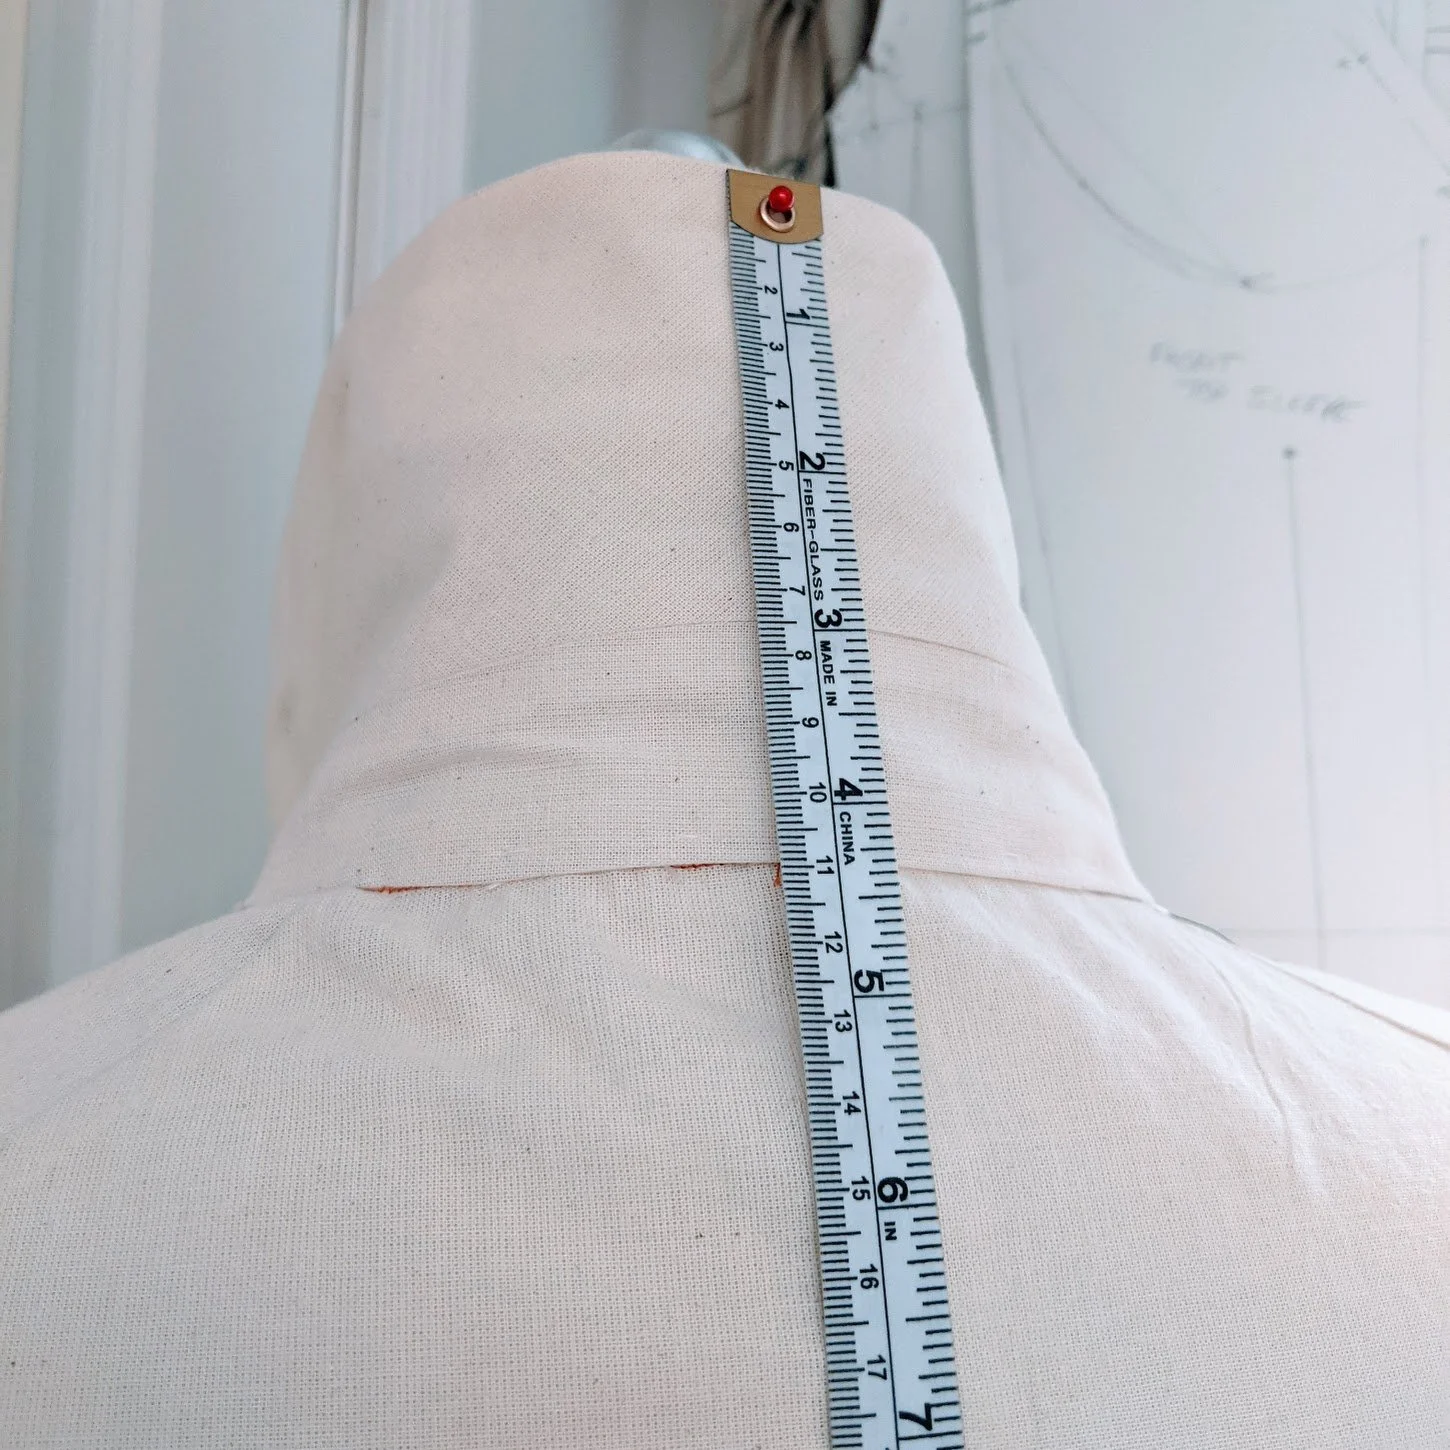
In search of collar drama
I’ve had more than enough practice drafting a collar with a hidden stand these past few days. In the end I drafted and constructed four variations searching for right size and shape. Welcome to the Raglan Overcoat graveyard of failed collars; most better left forgotten.

I have to believe that all the effort that went into drafting, cutting, making, attaching, and subsequently ripping out four collars was worth it. After several days the drama of collar #3 sealed the deal. I hope others will agree.


I love a swoopy collar!
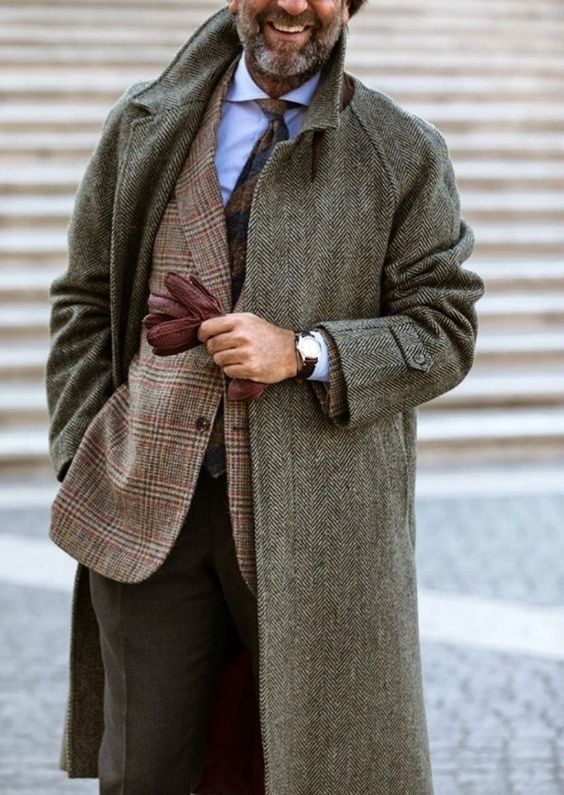
This coat was on the project mood board
I’ve had this picture in my Pinterest collection for awhile. The coat is from the Swedish clothier Rose & Born. I’ve always admired the sweep of its collar, and feel that I came damn close to nailing it. (I might even have surpassed it in the drama department!).
The final result
I’m positively stunned by how this toile fits! Hats off to Winifred Aldrich! The sleeve length is perfect, and there’s enough ease to easily wear a jacket or sweater under it. (I’m wearing a shirt and sweater vest in these photos). There’s 8 cm ease (about 3.25 in.) at the waist. At the chest there is 17 cm (about 6.5 in.) It’s all a bit too good to be true.

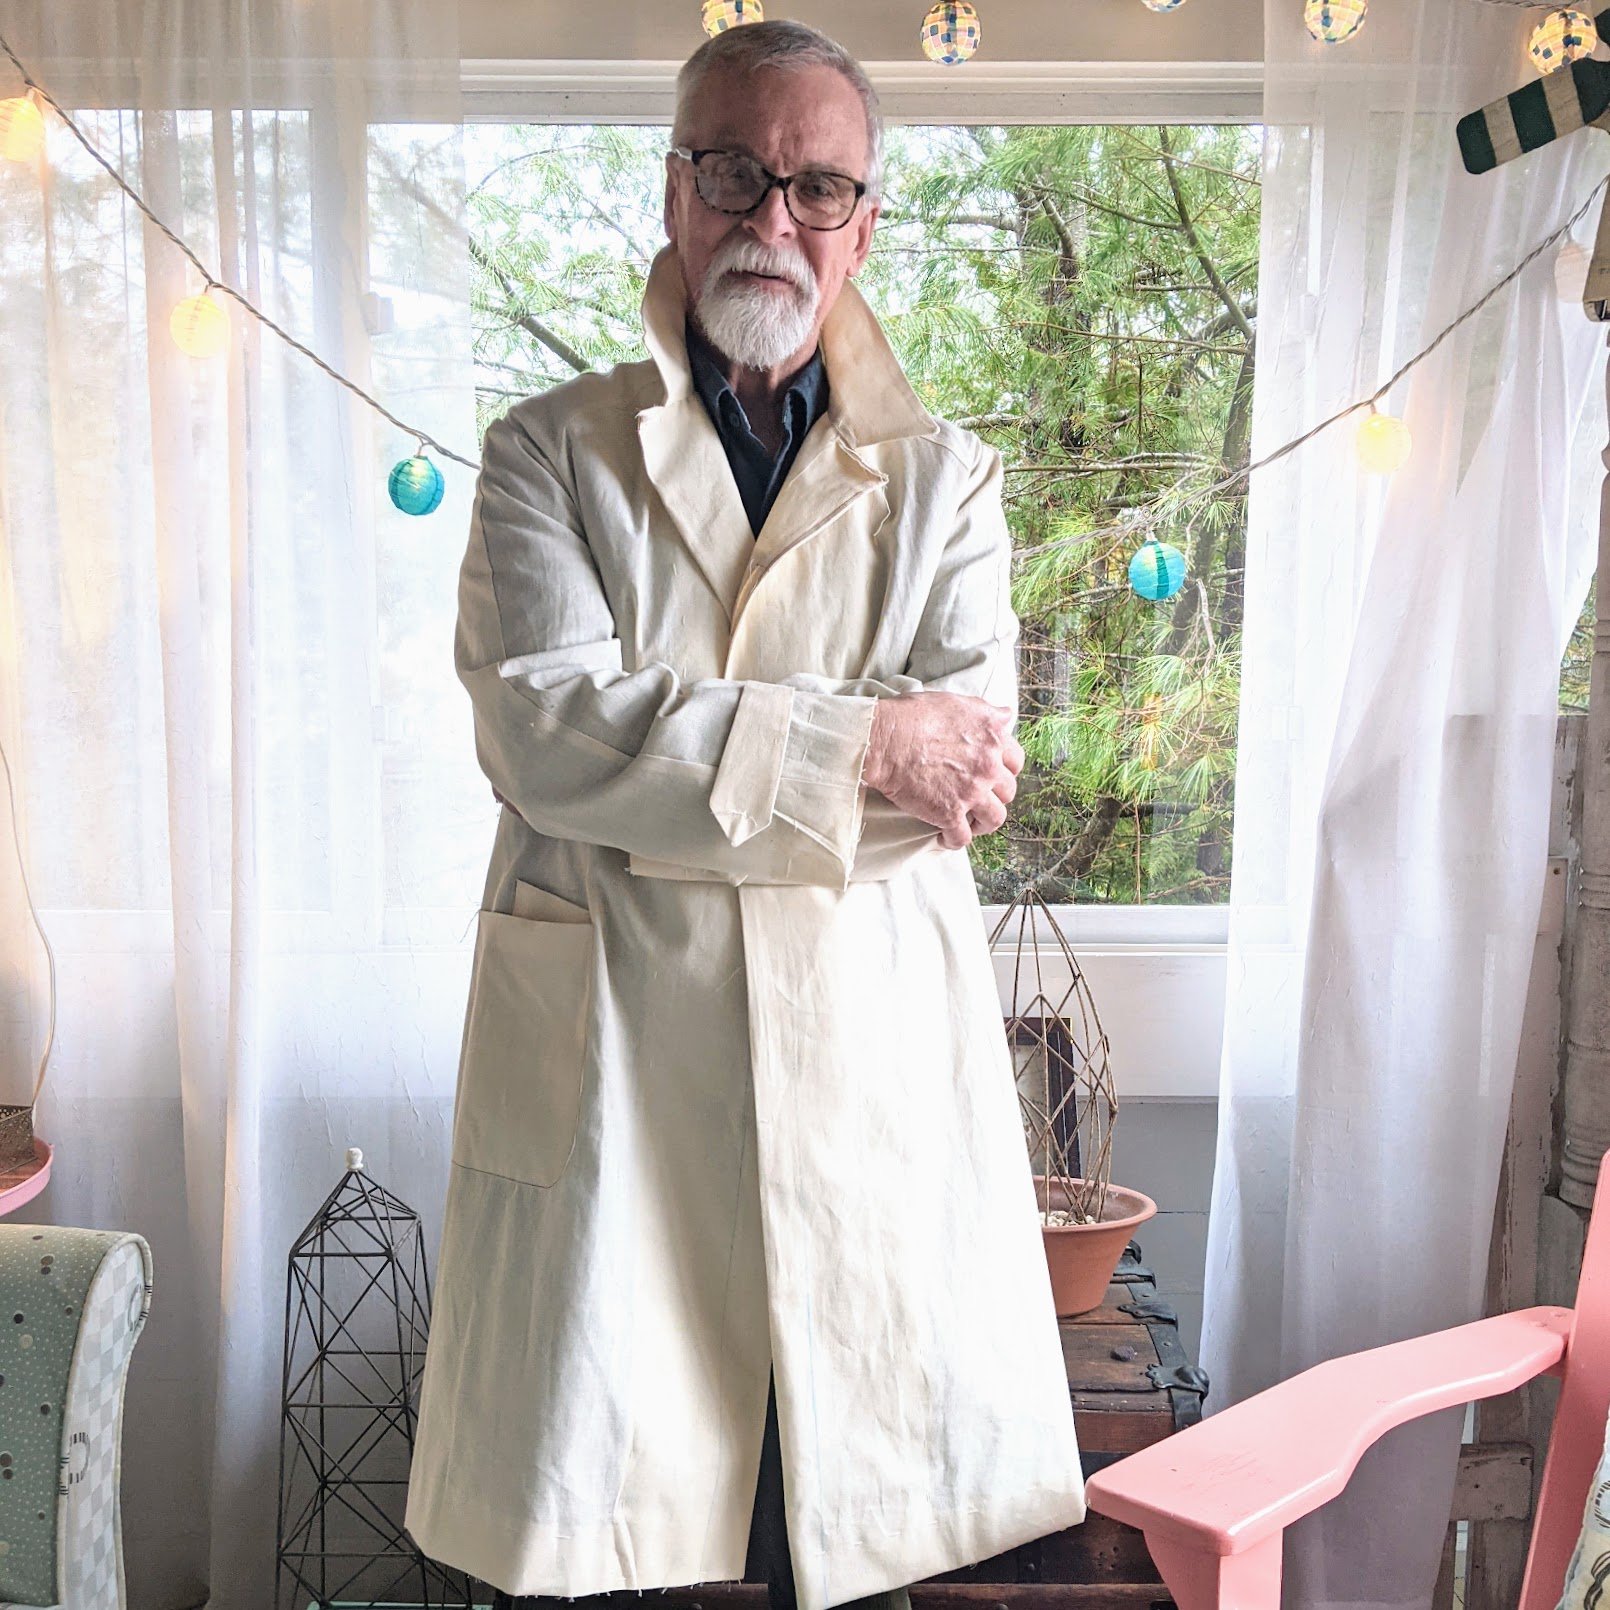
This is the most detailed toile I’ve ever made, but so worth the effort. The accuracy of the draft is indisputable, so I can move forward with confidence. For those of you who have followed and supported me for so many years, you know I’ve always tried to “push the envelope” a little bit with each project I undertake. This was a giant “push” for me, and to be drafting my own outerwear is a real dream come true. I am so grateful.
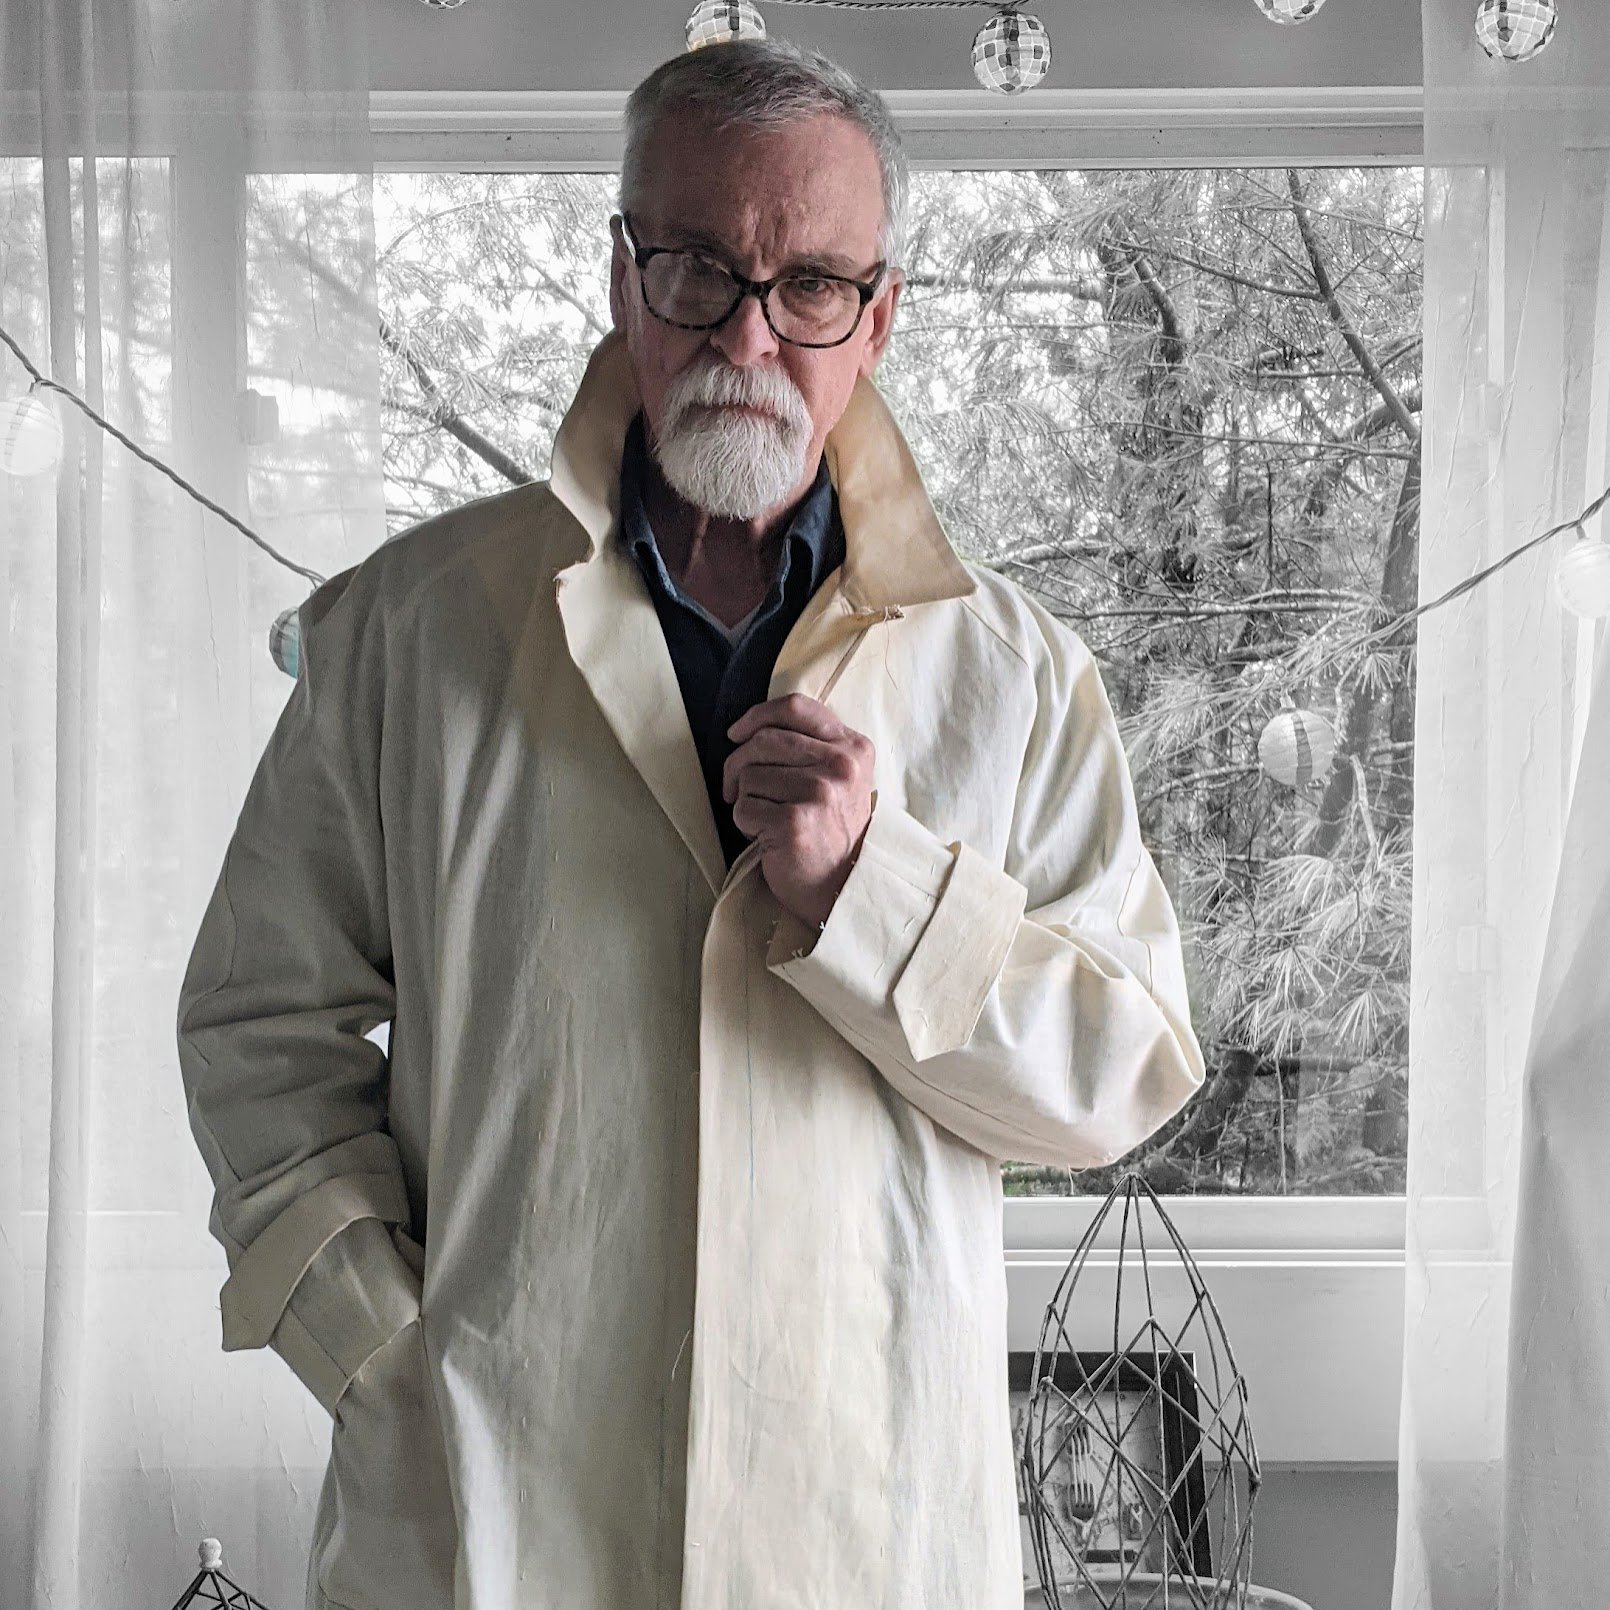
The clunky sleeve tab!
